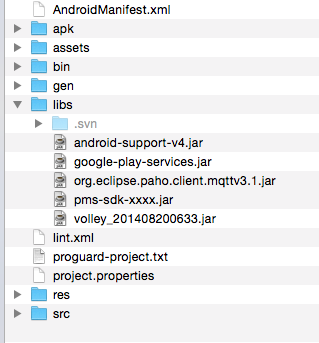
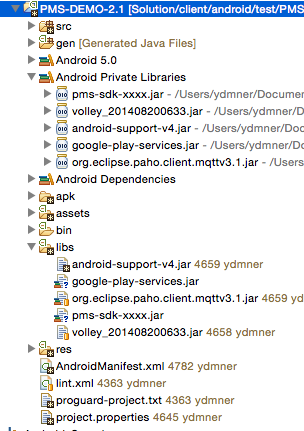
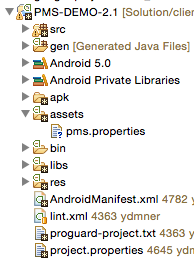
2. 设置AndroidManifest.xml
设置实行PMS的 Permission, Service, Receiver, Meta Data等.
请参考例子 AndroidManifest.xml
2.1 添加 Permission
<!-- push -->
<permission android:name="$(project_package).permission.C2D_MESSAGE" android:protectionLevel="signature" />
<uses-permission android:name="$(project_package).permission.C2D_MESSAGE" />
<uses-permission android:name="com.google.android.c2dm.permission.RECEIVE" />
<uses-permission android:name="android.permission.RECEIVE_BOOT_COMPLETED" />
<uses-permission android:name="android.permission.USE_CREDENTIALS" />
<uses-permission android:name="android.permission.GET_ACCOUNTS" />
<uses-permission android:name="android.permission.WAKE_LOCK" />
<uses-permission android:name="android.permission.GET_TASKS" />
<uses-permission android:name="android.permission.DISABLE_KEYGUARD"/>
<uses-permission android:name="android.permission.VIBRATE" />
<!-- push -->

<!-- network -->
<uses-permission android:name="android.permission.INTERNET" />
<uses-permission android:name="android.permission.ACCESS_NETWORK_STATE" />
<!-- network -->

<!-- storage -->
<uses-permission android:name="android.permission.WRITE_EXTERNAL_STORAGE" />
<!-- storage -->

<!-- state -->
<uses-permission android:name="android.permission.READ_PHONE_STATE" />
<!-- state -->
添加 <manifest> 标签.$(project_package)是 manifest标签里的 package$(project_package) 例子 (Package Name为 "com.humuson.app"的时候)
<!-- push -->
<permission android:name="com.humuson.app.permission.C2D_MESSAGE" android:protectionLevel="signature" />
<uses-permission android:name="com.humuson.app.permission.C2D_MESSAGE" />
...
2.2 添加 GCM receiver
<!-- pms GCM Receiver -->
<receiver
    android:name="com.pms.sdk.push.PushReceiver"
    android:permission="com.google.android.c2dm.permission.SEND" >
    <intent-filter>
        <action android:name="com.google.android.c2dm.intent.RECEIVE" />
        <action android:name="com.google.android.c2dm.intent.REGISTRATION" />
        <category android:name="$(project_package)" />
    </intent-filter>
</receiver>
添加 <application> 标签.$(project_package)是 manifest标签里的 package$(project_package) 例子 (Package Name为 "com.humuson.app"的时候)
<receiver
    android:name="com.pms.sdk.push.PushReceiver"
    android:permission="com.google.android.c2dm.permission.SEND" >
    <intent-filter>
        <action android:name="com.google.android.c2dm.intent.RECEIVE" />
        <action android:name="com.google.android.c2dm.intent.REGISTRATION" />
        <category android:name="com.humuson.app" />
    </intent-filter>
</receiver>
为了使用 Google Service如下添加.
在res文件夹里的 values里 添加version.xml后文件里添加以下代码
<meta-data android:name="com.google.android.gms.version" android:value="@integer/google_play_services_version" />
2.3 添加 PushPopupActivity
<!-- pms push popup activity -->
<activity
    android:name="${push_popup_activity}"
    android:theme="@style/push_popup_theme"
    android:excludeFromRecents="true"
    android:exported="false"
    android:screenOrientation="portrait"
    android:configChanges="orientation" />
添加<application> 标签${push_popup_activity}是接收推送时输出的Popup Activity的 className.- 想要使用PMS提供的基本PushPopupActivity的话设定 "com.pms.sdk.push.PushPopupActivity".
- 想要使用Custom PushPopupActivity的话把开发的className在
${push_popup_activity}里设定后pms.properties和 push_popup_activity的值保持一致
Custom PushPopupActivity 使用例子 (PushPopupAcitivity className是 "com.custom.push.CusomPushPopupActivity"的时候)
<!-- pms push popup activity -->
<activity
    android:name="com.custom.push.CusomPushPopupActivity"
    android:theme="@style/push_popup_theme"
    android:excludeFromRecents="true"
    android:exported="false"
    android:screenOrientation="portrait"
    android:configChanges="orientation" />
push_popup_activity=com.custom.push.CusomPushPopupActivity
2.4 添加 PushNotiReceiver
<!-- pms push clickNotiReceiver -->
<receiver android:name="${noti_receiver_class}" >
    <intent-filter>
        <action android:name="${noti_receiver}" />
    </intent-filter>
</receiver>
添加<application>标签${noti_receiver_class}是接收推送时输出的点击上端 Notification时实行 Receiver的 className.${noti_receiver}是接收推送时输出的点击上端 Notification时实行, broadcasting的 intent action.- pms.properties 中
noti_receiver里 需要一致noti receiver(intent action).
NotiReceiver 使用 (NotiReceiverClass className是 "com.custom.push.CustomNotiReceiverClass", notiReceiver intent action是 "com.custom.push.notifiaction"的时候)
<!-- pms push clickNotiReceiver -->
<receiver android:name="com.custom.push.CustomNotiReceiverClass" >
    <intent-filter>
        <action android:name="com.custom.push.notifiaction" />
    </intent-filter>
</receiver>
noti_receiver=com.custom.push.notifiaction
2.5 添加Private Server service 以及 receiver
<!-- PMS Private RestartReceiver -->
<receiver android:name="com.pms.sdk.push.mqtt.RestartReceiver">
    <intent-filter>
        <action android:name="ACTION_MQTT_PING" />
        <action android:name="android.intent.action.BOOT_COMPLETED" />
        <action android:name="android.intent.action.USER_PRESENT" />
        <action android:name="android.intent.action.ACTION_PACKAGE_RESTARTED" />
    </intent-filter>
</receiver>

<!-- PMS Private connectionChangeReceiver -->
<receiver android:name="com.pms.sdk.push.mqtt.ConnectionChangeReceiver" android:label="NetworkConnection">
    <intent-filter>
        <action android:name="android.net.conn.CONNECTIVITY_CHANGE"/>
    </intent-filter>
</receiver>

<!-- Private PUSH Service -->
<service
    android:name="com.pms.sdk.push.mqtt.MQTTService"
    android:enabled="true"
    android:exported="true"
    android:label="PushService"
    android:process="${process_name}" />

<!-- Private PUSH Receiver -->
<receiver android:name="com.pms.sdk.push.PushReceiver" >
    <intent-filter>
        <action android:name="org.mosquitto.android.mqtt.MSGRECVD" />
        <category android:name="${project_package}" />
    </intent-filter>
</receiver>
- 添加
<application> 标签.
${process_name}是 Android Process Name.${process_name} 使用例子 (Process Name是 "com.pms.sdk.HumusonpushService"的时候)
<!-- Private PUSH Service -->
<service
    android:name="com.pms.sdk.push.mqtt.MQTTService"
    android:enabled="true"
    android:exported="true"
    android:label="PushService"
    android:process="com.pms.sdk.HumusonpushService" />
${project_package}是 manifest标签的 package.
${project_package} 使用例子 (Package Name是 "com.humuson.app"的时候)
<!-- Private PUSH Receiver -->
<receiver android:name="com.pms.sdk.push.PushReceiver" >
    <intent-filter>
        <action android:name="org.mosquitto.android.mqtt.MSGRECVD" />
        <category android:name="com.humuson.app" />
    </intent-filter>
</receiver>
2.6 添加Notification 设定值
<meta-data android:name="PMS_NOTI_CONTENT" android:value="${noti_content}" />
- 包含图片的Notification,不显示图片时显示的文本.
- 设置上面值的时候会显示上面的内容.
${noti_content} 使用例子 (value值为 "利用手指往下拉."的时候)
<meta-data android:name="PMS_NOTI_CONTENT" android:value="利用手指往下拉." />
- 使用Resource/value/string.xml里添加 'finger_event' 值
<meta-data android:name="PMS_NOTI_CONTENT" android:value="@string/finger_event" />
2.7 添加Notification Icon 设定值
<meta-data android:name="PMS_SET_ICON" android:resource="@drawable/${icon_file_name}" />
<meta-data android:name="PMS_SET_LARGE_ICON" android:resource="@drawable/${icon_file_name}" />
${icon_file_name}是在Notification Icon里输入的 Icon File Name.- Android 5.0之后App Icon和在Notification Bar的Icon是不相同的
2.8 添加Push Alram Sound设置值
<meta-data android:name="PMS_SET_NOTI_SOUND" android:resource="@raw/${ring_file_name}"/>
- 在
${ring_file_name} Resource/Raw/ 里放入音效名.
- 需要默认音效的话可以不添加
3. 添加 Style
<!-- push popup theme -->
<style name="push_popup_theme" parent="android:Theme.Light">
    <item name="android:windowNoTitle">true</item>
    <item name="android:windowIsTranslucent">true</item>
    <item name="android:windowBackground">@android:color/transparent</item>
    <item name="android:windowContentOverlay">@null</item>
</style>
4. 设置pms.properties 文件
# PMS App Key & API Server Url Setting
# 为了推送GCM的App用projectId获取GCM的pushToken.
gcm_project_id=${Google_Project_Number}

# 在PMS Admin Web里生成App是发布的key.
app_key=${App_key}

# PMS Msg-Api Url.
api_server_url=${Msg_Api_Url}

# Private Server Setting
# mqtt的使用. ("Y":使用, "N":不使用)
mqtt_flag=${mqtt_flag}

# 需要对接private server时所需要的 server url.
# 必须输入以下内容 protocol, url, port. (不使用时添加空白)
mqtt_server_url_ssl=${mqtt_ssl_url}
mqtt_server_url_tcp=${mqtt_tcp_url}

# private server的 keep alive time. 单位是秒(second).
# (KeepAlive Total Time : Keep alive time + Ramdom Time(2~4min))
mqtt_server_keepalive=${mqtt_keepalive}

# DEBUG MODE
# 关于Logcat 设置.
debug_tag=PMS
debug_flag=Y

# 设置Service的log.
debug_log_falg=Y

# PMS SETTING
# 接收推送时的接收画面的On/Off.
screen_wakeup_flag=Y

# 接收推送时在画面上显示的时间(单位 : ms)
push_popup_showing_time=9999999

# 显示推送是使用当前App的时候显示(默认)
# 或者使用别的App时候是不显示(default = N)
push_popup_showing_flag=N

# 接收推送时触摸上端Notification时候要broadcasting的 intent action.
noti_receiver=${noti_receiver}

# 接收推送时显示的Popup Activity的 className.
# (Default Class : "com.pms.sdk.push.PushPopupActivity")
push_popup_activity=${push_popup_activity}
- 为了推送GCM获取Project ID的方法
- 在谷歌政策是只能实行App的时候才能显示弹出框.
- 但是在
push_popup_showing_flag里把值改为 Y的话跟以前一样池使用.
5. 设置Notification Bar Touch的 BroadcastReceiver
5.1 CustomNotiReceiverClass
需要继承BroadcaseReceiver.
在intent获取Data方法参考Push Data这一项.
package com.custom.push;

import android.content.BroadcastReceiver;
import android.content.Context;
import android.content.Intent;

public class CustomNotiReceiverClass extends BroadcastReceiver {
    @Override
    public void onReceive(Context context, Intent intent) {
        // notification 触摸时显示“push notiMsg:${notiMsg}” 文本.
        Toast.makeText(contetx, "push notiMsg:" + intent.getStringExtra(PMS.KEY_NOTI_MSG),
            Toast.LENGTH_SHORT).show();
    }
}
5.2. Push Data
参考onReceivePushListener的 intent获取以下数据.
intent.getStringExtra(PMS.KEY_MSG_ID) // "i" - 信息 ID
intent.getStringExtra(PMS.KEY_NOTI_TITLE) // "notiTitle" - notification显示的标题
intent.getStringExtra(PMS.KEY_NOTI_MSG) // "notiMsg" - notification显示的内容
intent.getStringExtra(PMS.KEY_NOTI_IMG) // "notiImg" - notification显示的图片URL
intent.getStringExtra(PMS.KEY_MSG) // "message" - 富媒体内容
intent.getStringExtra(PMS.KEY_SOUND) // "sound" - 接收推送时音效
intent.getStringExtra(PMS.KEY_MSG_TYPE) // "t" - 推送信息类型 : H – html, T – Text, L – Link
intent.getStringExtra(PMS.KEY_DATA) // "d" - 附加数据
PushMsg pushMsg = new PushMsg(intent.getExtras());
pushMsg.msgId // 信息 ID
pushMsg.notiTitle // notification显示的标题
pushMsg.notiMsg // notification显示的内容
pushMsg.notiImg // notification显示的图片URL
pushMsg.message // 富媒体内容
pushMsg.sound // 接收推送时音效
pushMsg.msgType // 推送信息类型 : H – html, T – Text, L – Link
pushMsg.data // 附加数据


